


Intensely coffee flavored yet super creamy, fluffy, smooth coffee whipped cream that you can use as a topping or filling, and even as frosting for cakes and cupcakes!
I show you the BEST ways to add coffee flavor to your whipped cream, and even how NOT to do it, with this well-tested recipe. Plus, two ways to stabilized the whipped cream too.
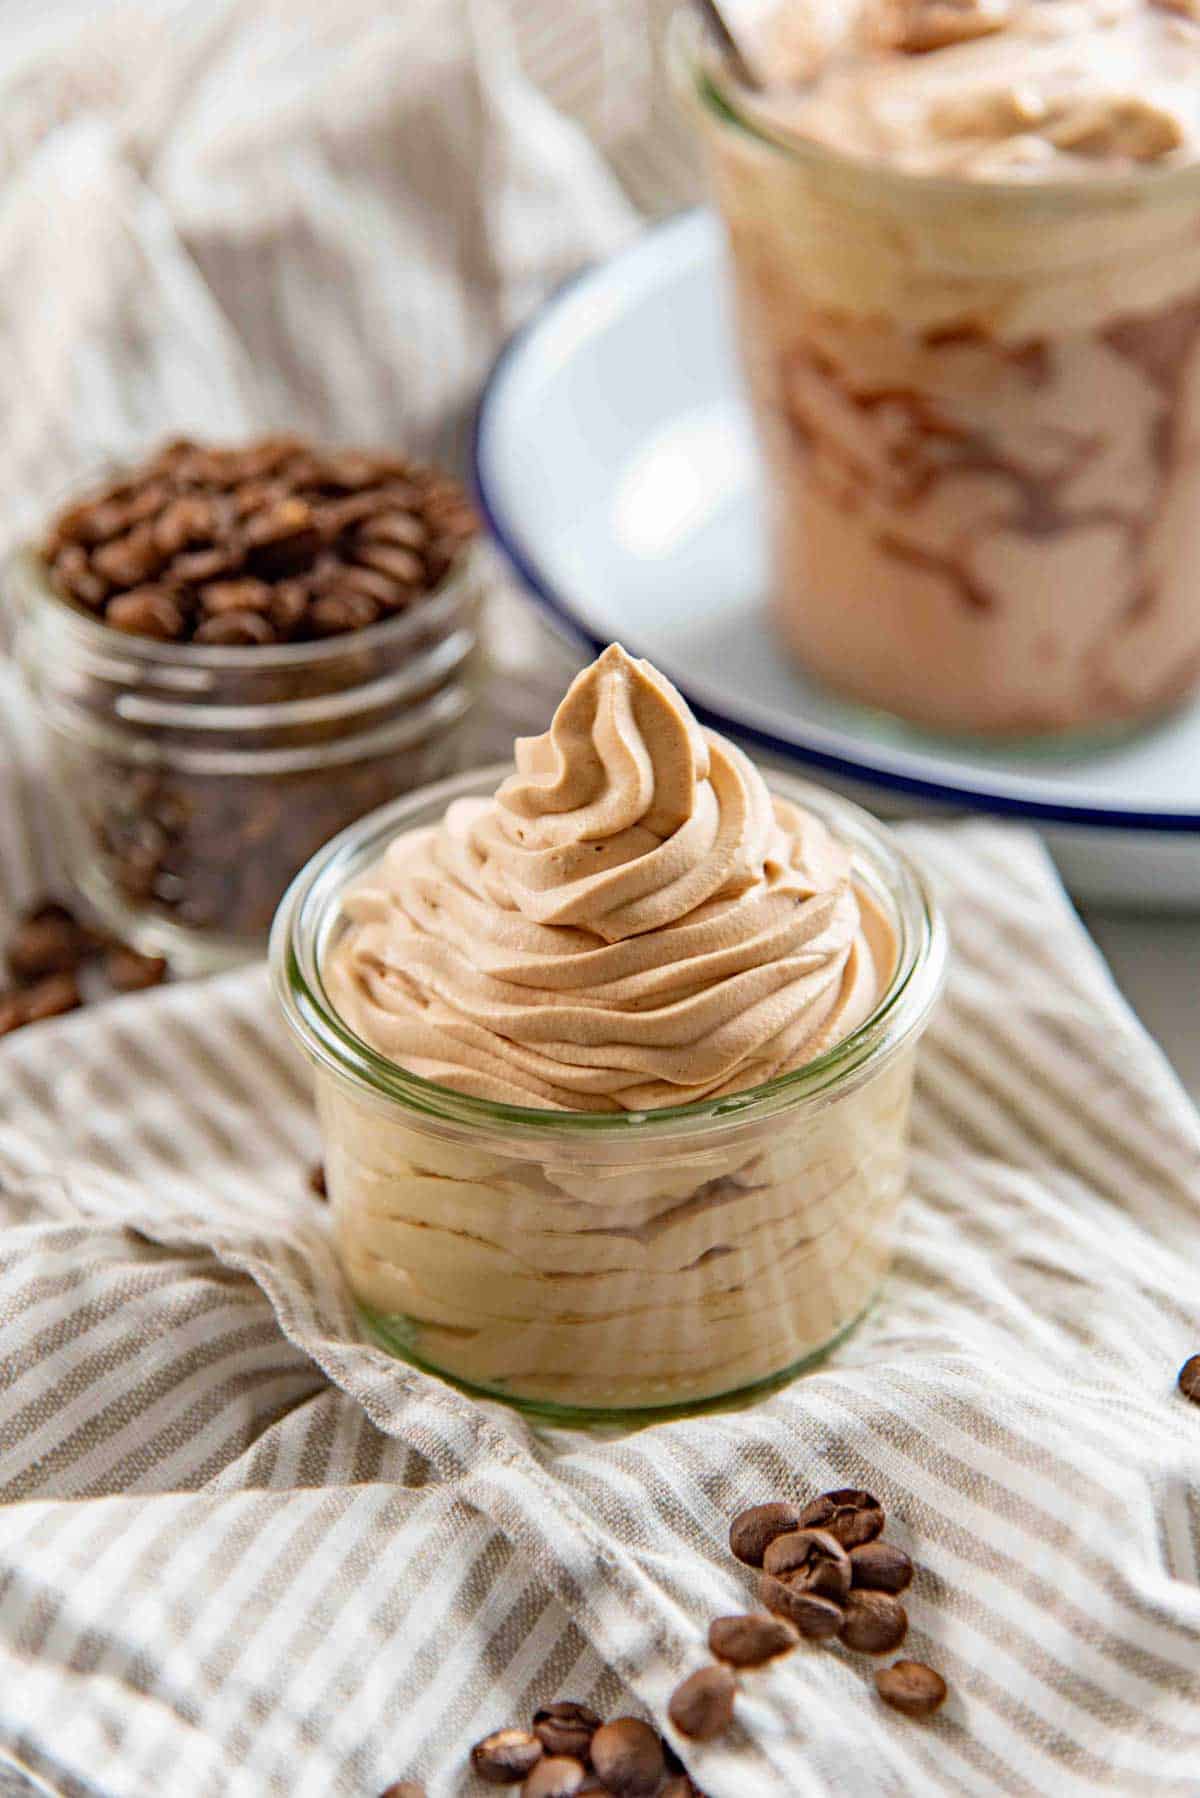
This one’s for all the coffee aficionados out there! If you want to add a lovely depth of flavor to your regular whipped cream, this coffee whipped cream is the real deal!
Here I show you how to get the most flavor from this variation, and how I tested different ways to make this coffee whipped cream stable so you can use it in so many different ways. From dolloping it over desserts to using it as a spreadable or pipeable frosting even!
Why this recipe works

- This recipe gives you a fluffy, smooth whipped cream with STRONG coffee flavor!
- I show a few different flavoring options, which works best, and which ones don’t from my recipe testing and experiences.
- This recipe also provides two different ways to stabilize the whipped cream, so you can make it in advance and keep it in the fridge.
- You can use this coffee whipped cream as frosting for cakes as it won’t melt and deflate, even after several hours!
- You can easily adjust the intensity of the flavor to suit your preferences too.
Different ways you can add coffee flavor to recipes
- Instant espresso powder
- Instant coffee granules
- Coffee extract
- Espresso shots
- Ground coffee
Instant espresso powder and instant coffee granules SHOULD NOT be confused with regular ground coffee!
You have to brew regular ground coffee, or use it to infuse flavor into the whipped cream. It doesn’t dissolve and will leave a gritty texture if used as is. I DO NOT recommend using ground coffee to make coffee whipped cream. Infusing the cream with ground coffee will not result in a strong flavor.
Espresso shots have a stronger flavor, but add moisture to the whipped cream that can de-stabilize it and make it runny. To combat this, you’ll have to add extra stabilizers.
So, I prefer to go with the remaining 3 options.
- Instant espresso powder – The most concentrated flavor, and stronger than instant coffee.
- Instant coffee granules – Will need to add more than espresso powder, but also provides a strong flavor.
- Coffee extract – Concentrated liquid form of coffee.

All of these options are the most concentrated sources of coffee flavor! The powder and granules will add no extra liquid, and the extract will add minimal liquid.
Coffee powder vs extract vs espresso substitutions
You can gauge how much coffee / espresso you need to add to get the strength you like, with this coffee substitution table!
1 double shot of espresso flavor is equal to
0.5 tbsp instant espresso powder
0.5 tbsp coffee extract (depending on the brand, I use Nielsen-Massey)
Between 0.75 – 1 tbsp instant coffee (depending on the brand and strength of the coffee)
Ingredients to make coffee whipped cream
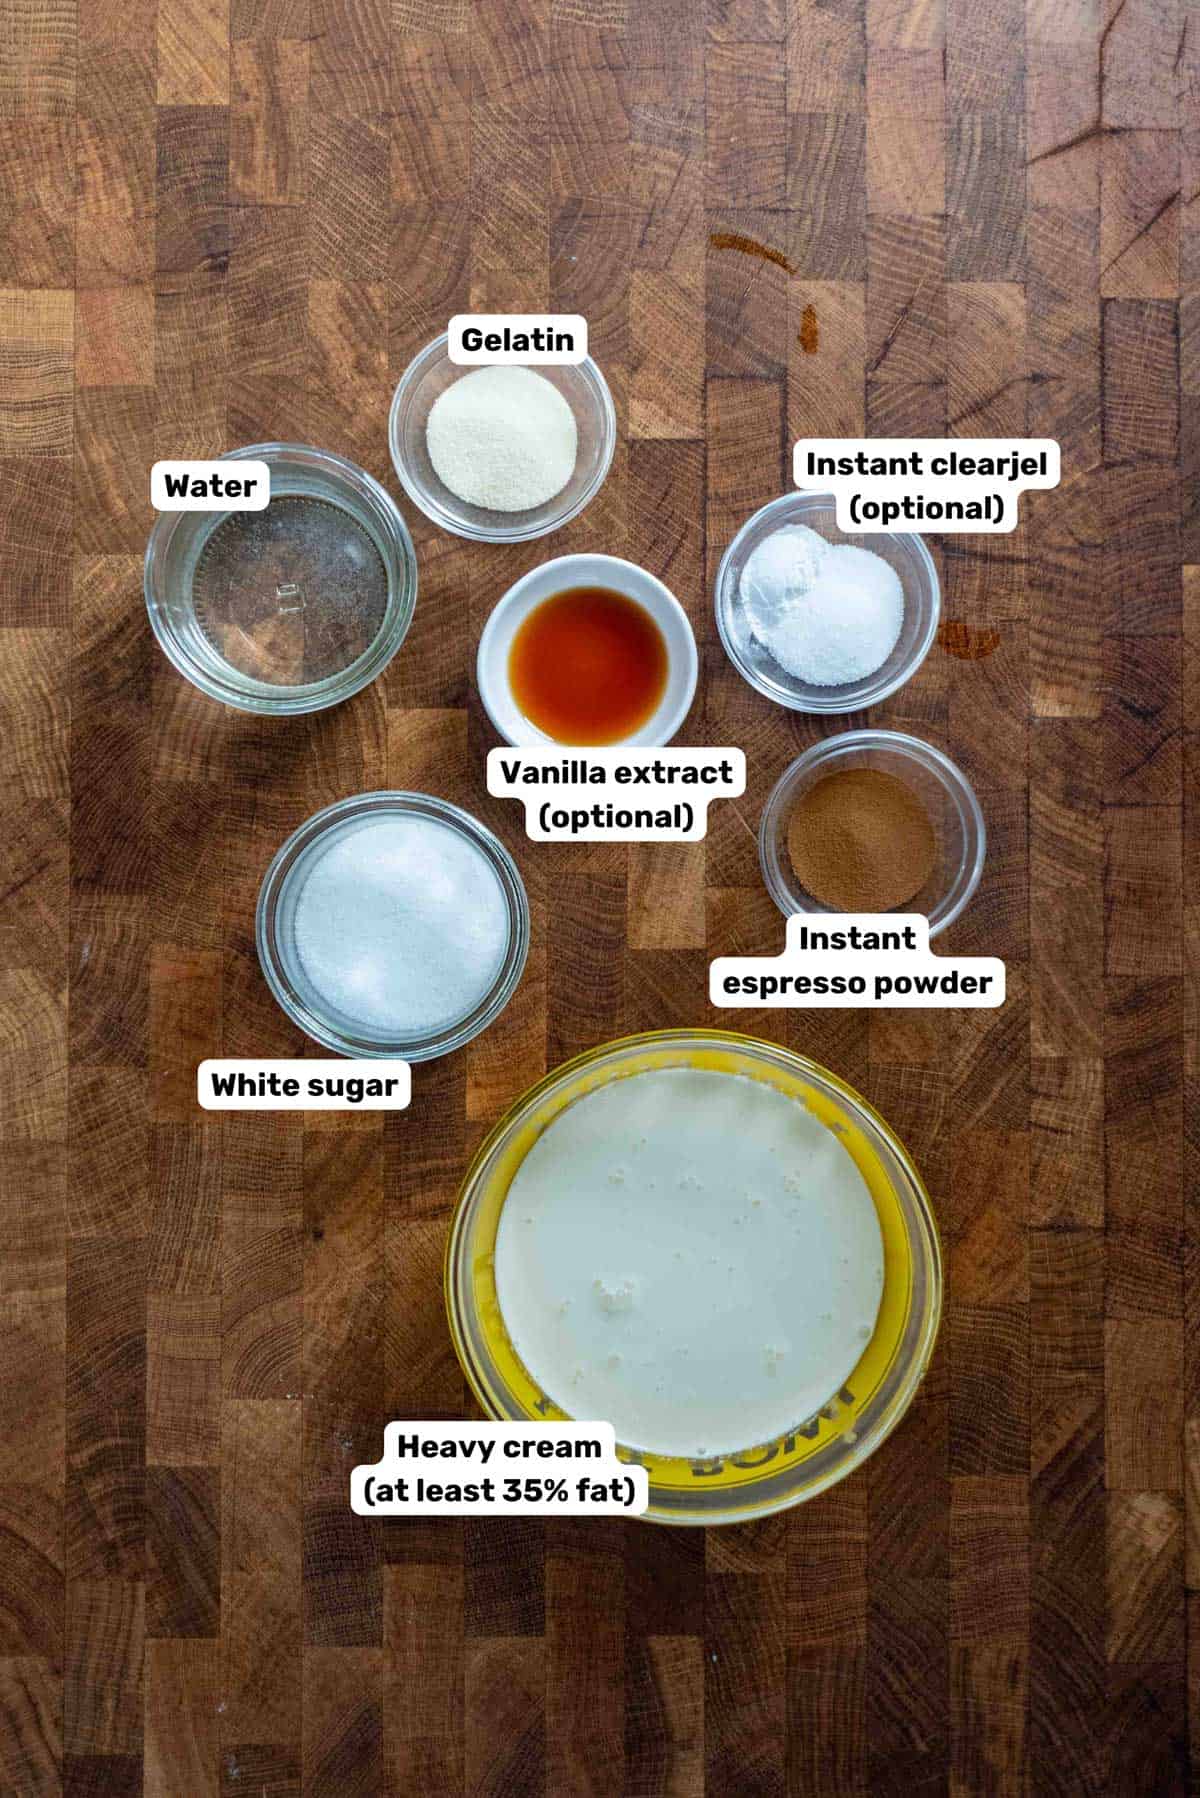
- Heavy cream – At least 35% fat content
- White sugar
- Vanilla
- Pinch of salt
- Instant espresso powder (or instant coffee)
- OPTIONAL – Water + Gelatin to stabilize the whipped cream.
- OR Instant clearjel / instant vanilla pudding mix
How to make coffee whipped cream
Step 1 – Prepare the stabilizers (if using)
Gelatin – Bloom the gelatin in room temperature water for about 10 – 15 minutes until the gelatin absorbs all the water (images 1 – 2).
Then microwave the mixture in 10 second bursts until the gelatin has dissolved, but don’t let it boil (image 3).
Finally, let the gelatin mixture cool down slightly, or cool it down quickly by adding a few tablespoons of chilled cream while stirring it.
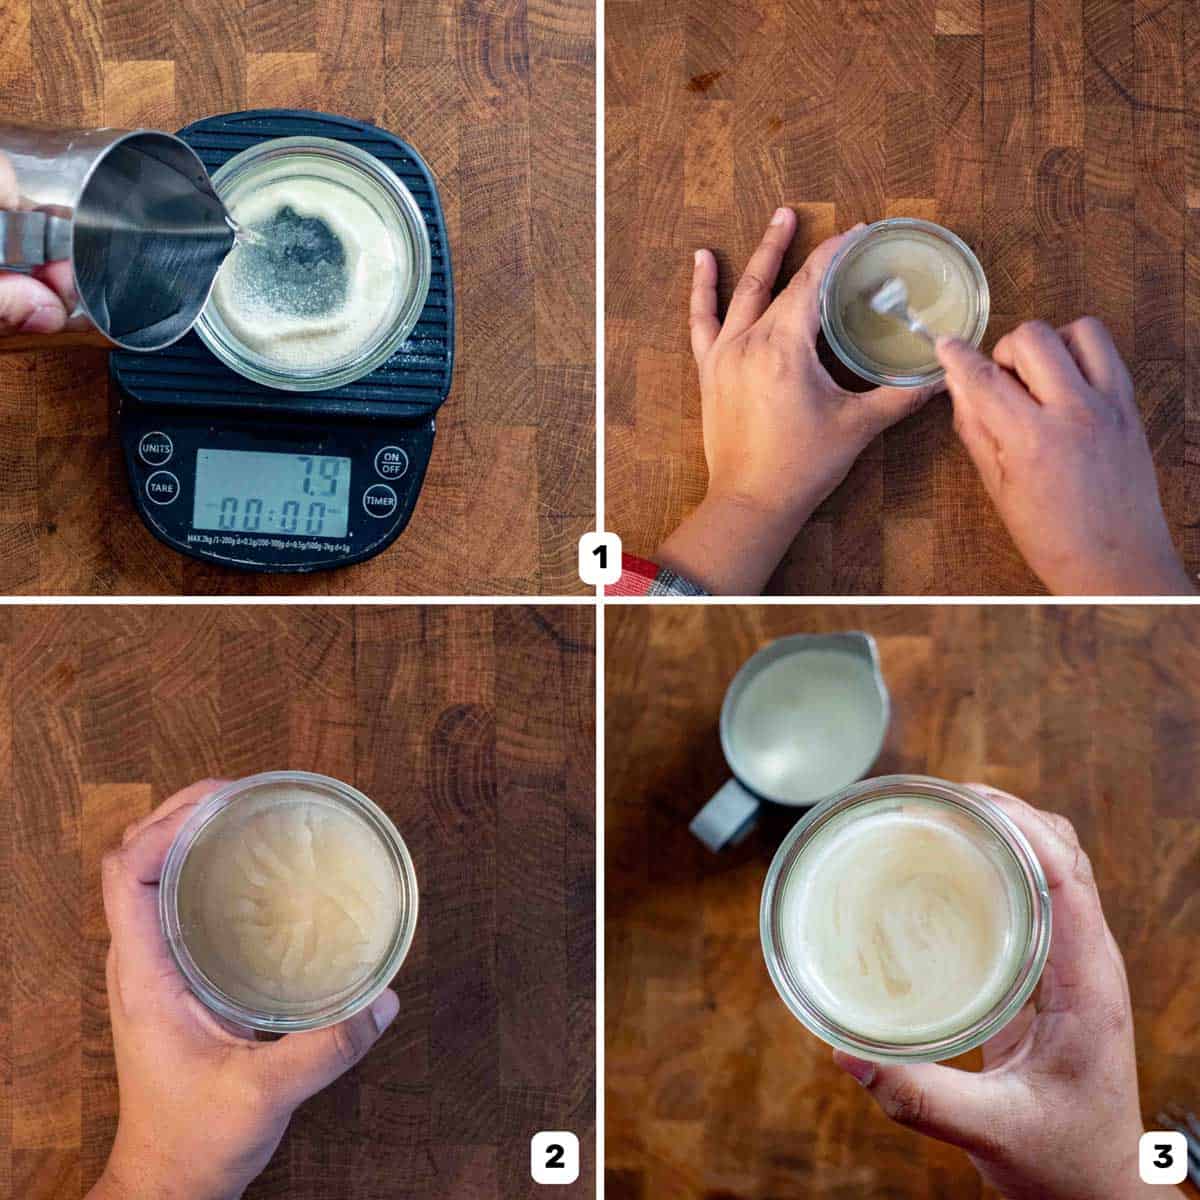
Bloom (gelatin) – When room temperature water is added to gelatin. With powder, a set amount of water is added. Gelatin leaves however are submerged in a bowl of water.
This allows the gelatin to absorb water and to swell up and saturate. This is called “bloomed gelatin”.
This allows the gelatin to easily dissolve when heated without leaving a gritty, lumpy mixture.
Instant clearjel – Whisk together some of the white sugar and instant clearjel until well combined.
Add about 1/2 – 3/4 cup of cream and vigorously whisk to dissolve the instant clearjel and sugar in the cream. There should be no lumps, but the mixture might seem a little grainy. Cover and let it sit for about 5 minutes.
Step 2 – Start whipping heavy cream
In the mixer bowl, place the heavy whipping cream, espresso powder, sugar, and salt (image 4). Make sure the cream is chilled, otherwise it won’t properly whip.
Start whisking the heavy cream (image 5).
If you’re using instant clearjel instead of gelatin, add the instant clearjel and heavy cream mixture with the remaining whipping cream and sugar, along with the other ingredients before starting to whisk at medium / medium high speed.
Step 3 – Add gelatin (if using)
Gradually increase the whisking speed to medium high speed. Stream in the melted and cooled gelatin into the heavy cream. Be careful to avoid directly pouring it onto the whisk.
Once the gelatin is added, increase the speed to high and let it whisk for about 1 minute to ensure the gelatin mixes in really well with no lumps.
Then reduce the speed to medium / medium high.
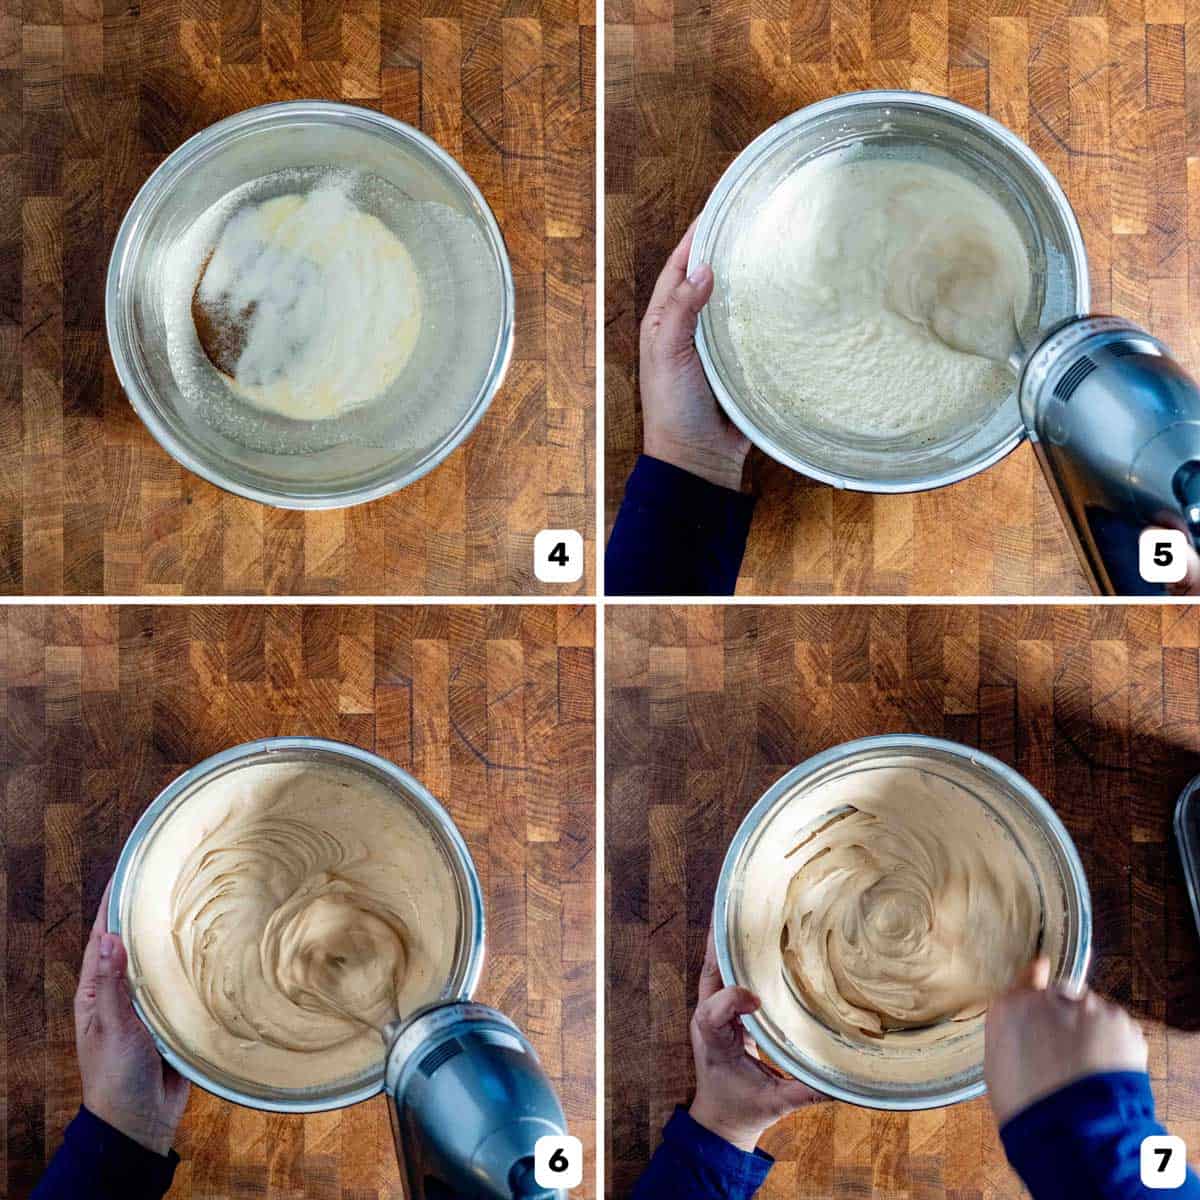
Step 4 – Whisk
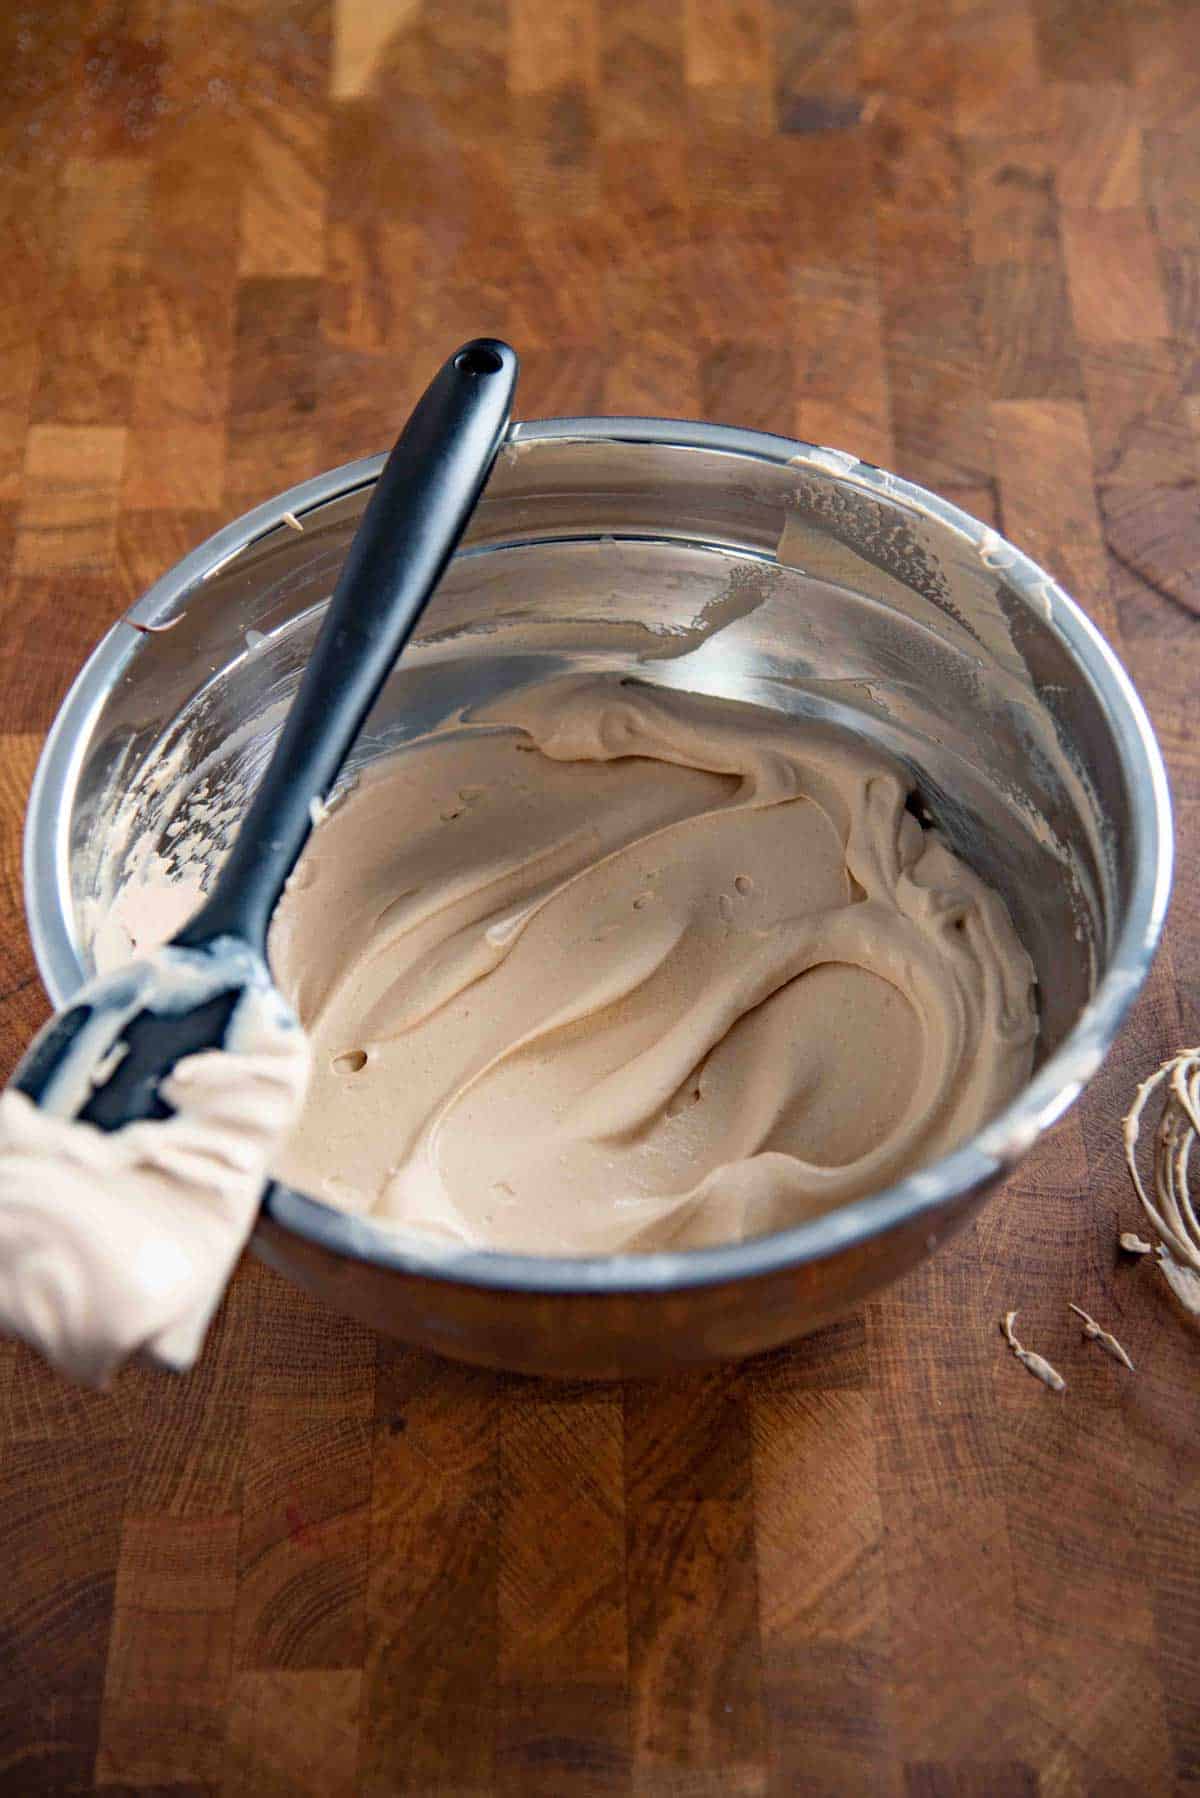
Whisk the whipped cream, and it’ll start to thicken and reach soft peaks (image 6), and then mid peaks.
Then do a quick taste test to check if you’d like to add more coffee flavor or sweetness. Add extra espresso powder or sugar if needed.
Whisk on low speed, or manually stir with a whisk (image 7) until the whipped cream reaches between mid peaks and stiff peaks (stiff-ish peaks).
You can refer my post on homemade whipped cream (chantilly cream) for a handy visual guide for these different whipped cream stages.
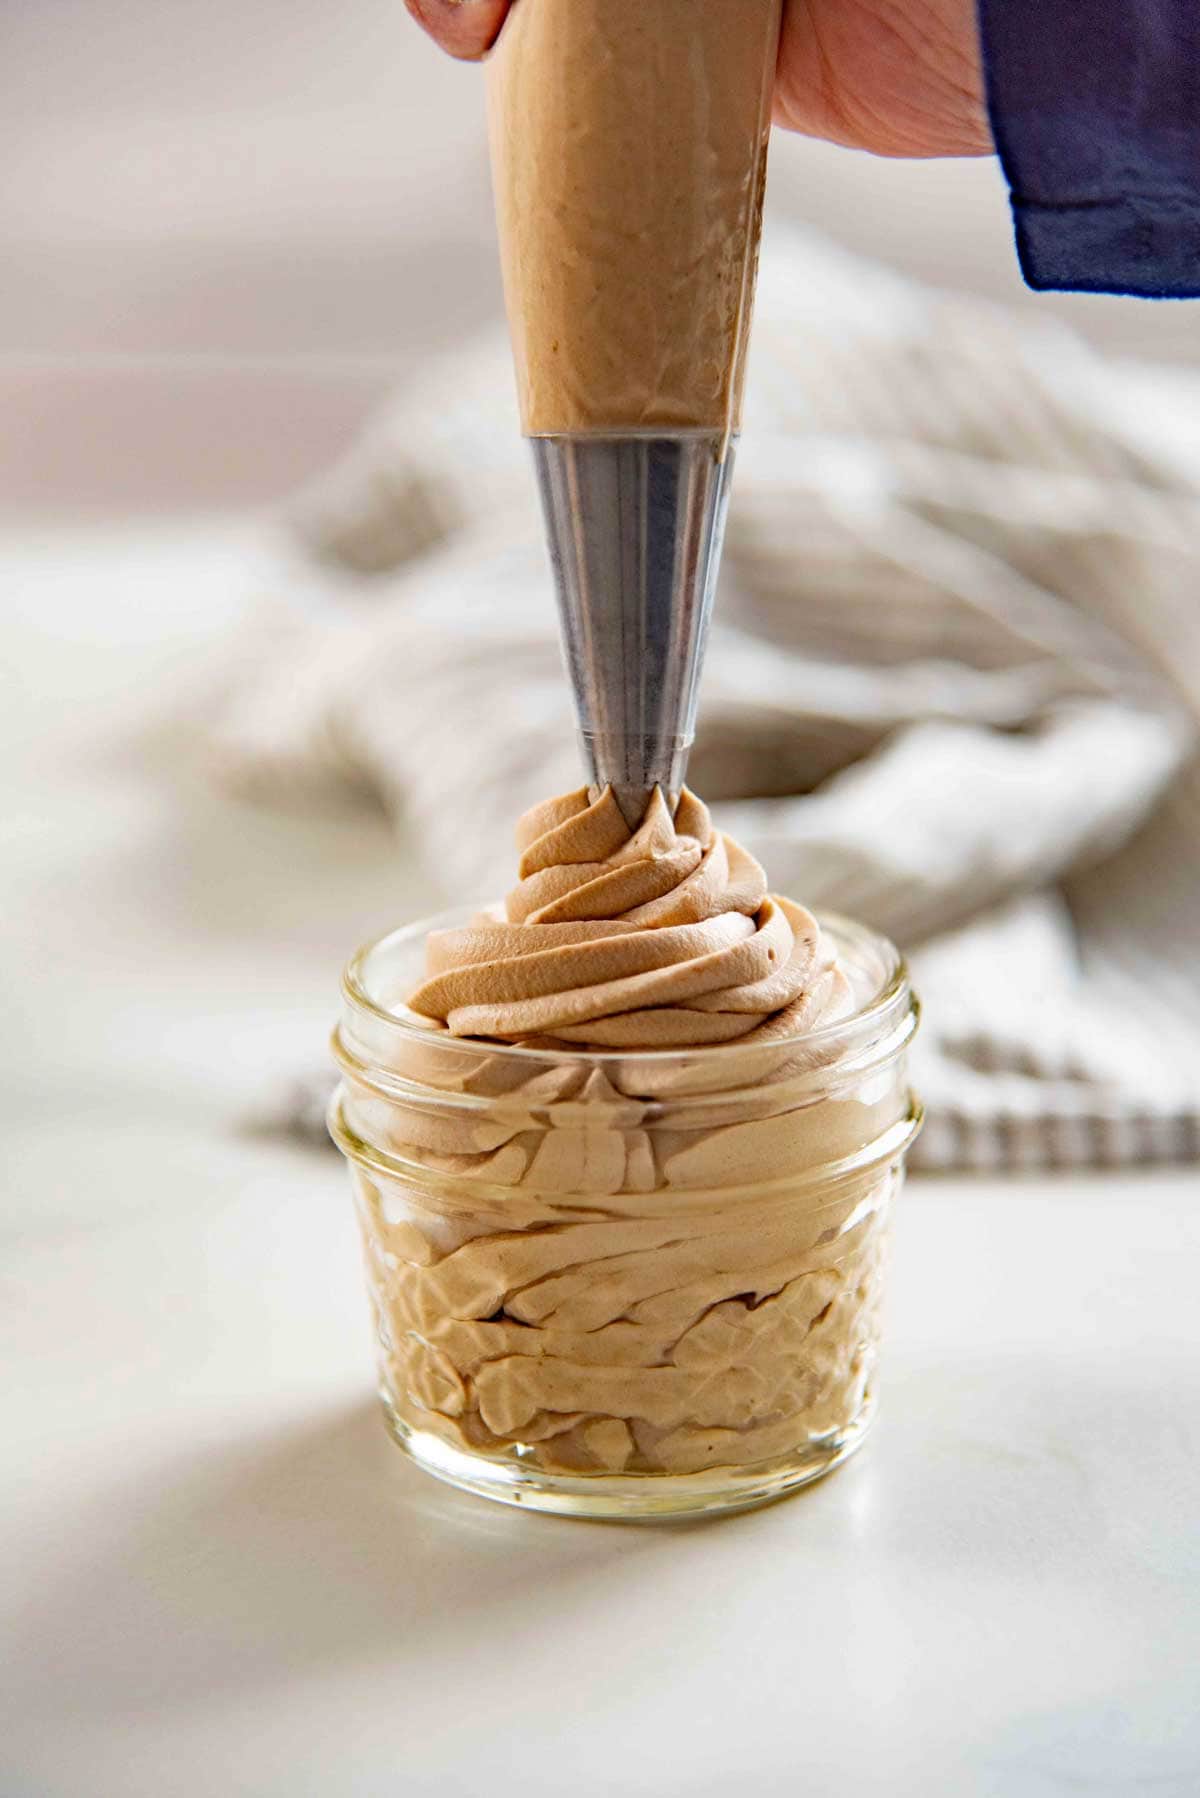
Step 5 – Ready to use
Use immediately!

Whisking tip
I prefer not to whisk the heavy cream to stiff peaks. The whipped cream will have a better, smoother texture when whisked to just under stiff peaks (I call this stiff-ish peaks or firm peaks).
This also allows you to spread or pipe the whipped cream without running the risk of overwhipping the cream and making it grainy.
If you’re using this to pipe or spread on cakes and other desserts, then I highly recommend adding a stabilizer such as gelatin or instant clearjel as I explain in my stabilized whipped cream post.
The stabilizer will prevent chances of overwhipping to an extent, and also gives the whipped cream more structure WITHOUT having to whip to stiff peaks.
Storage tips
If you used stabilizers, then you can store this whipped cream in the fridge for up to 5 days, with proper food-handling precautions.
The stabilizers will prevent the whipped cream from deflating. The cream might seem like it’s “set”, but if you stir it with a whisk, it’ll become smooth again and should be thick enough to pipe or spread.
WITHOUT stabilizers, the coffee whipped cream will start to deflate, and the water will start to separate from the cream. It might last in the fridge for about 1 day, but when it’s re-mixed or stirred again, it can become grainy.
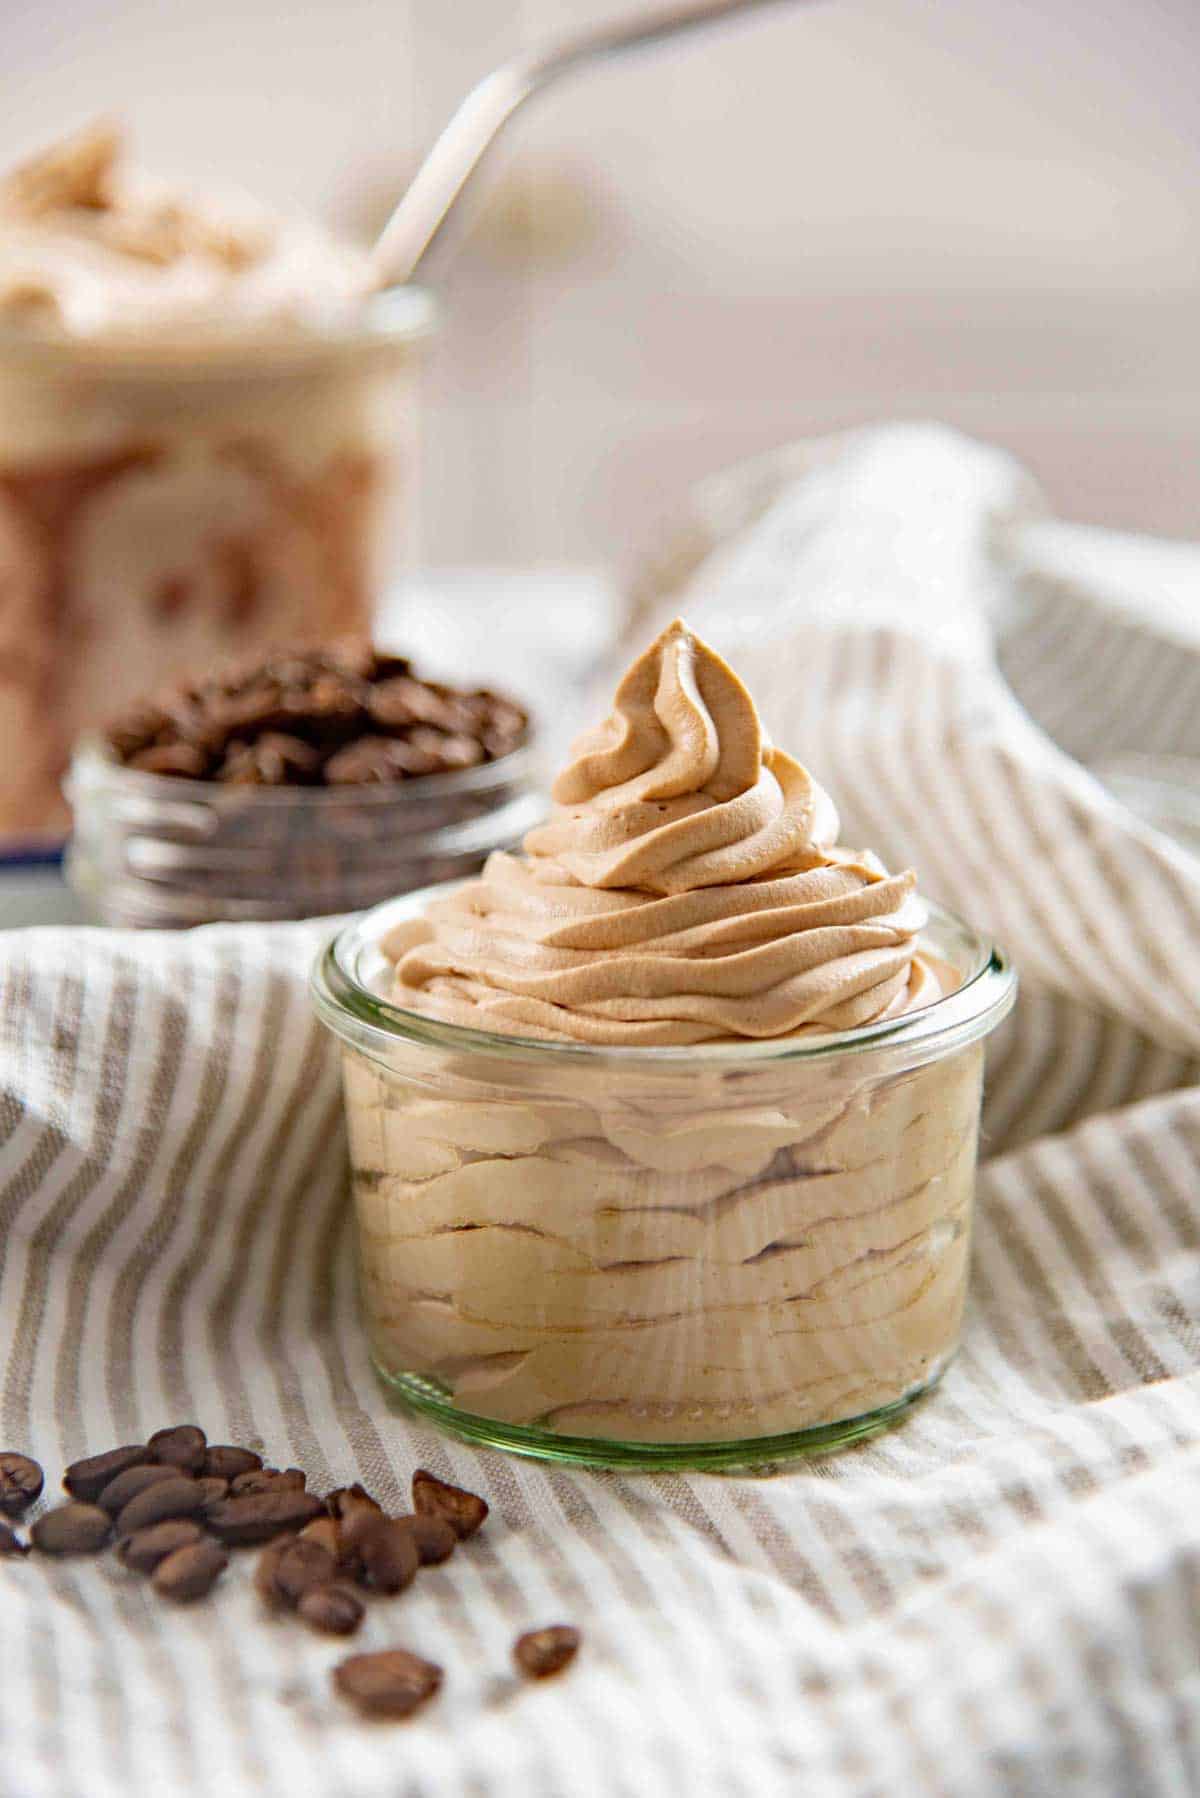
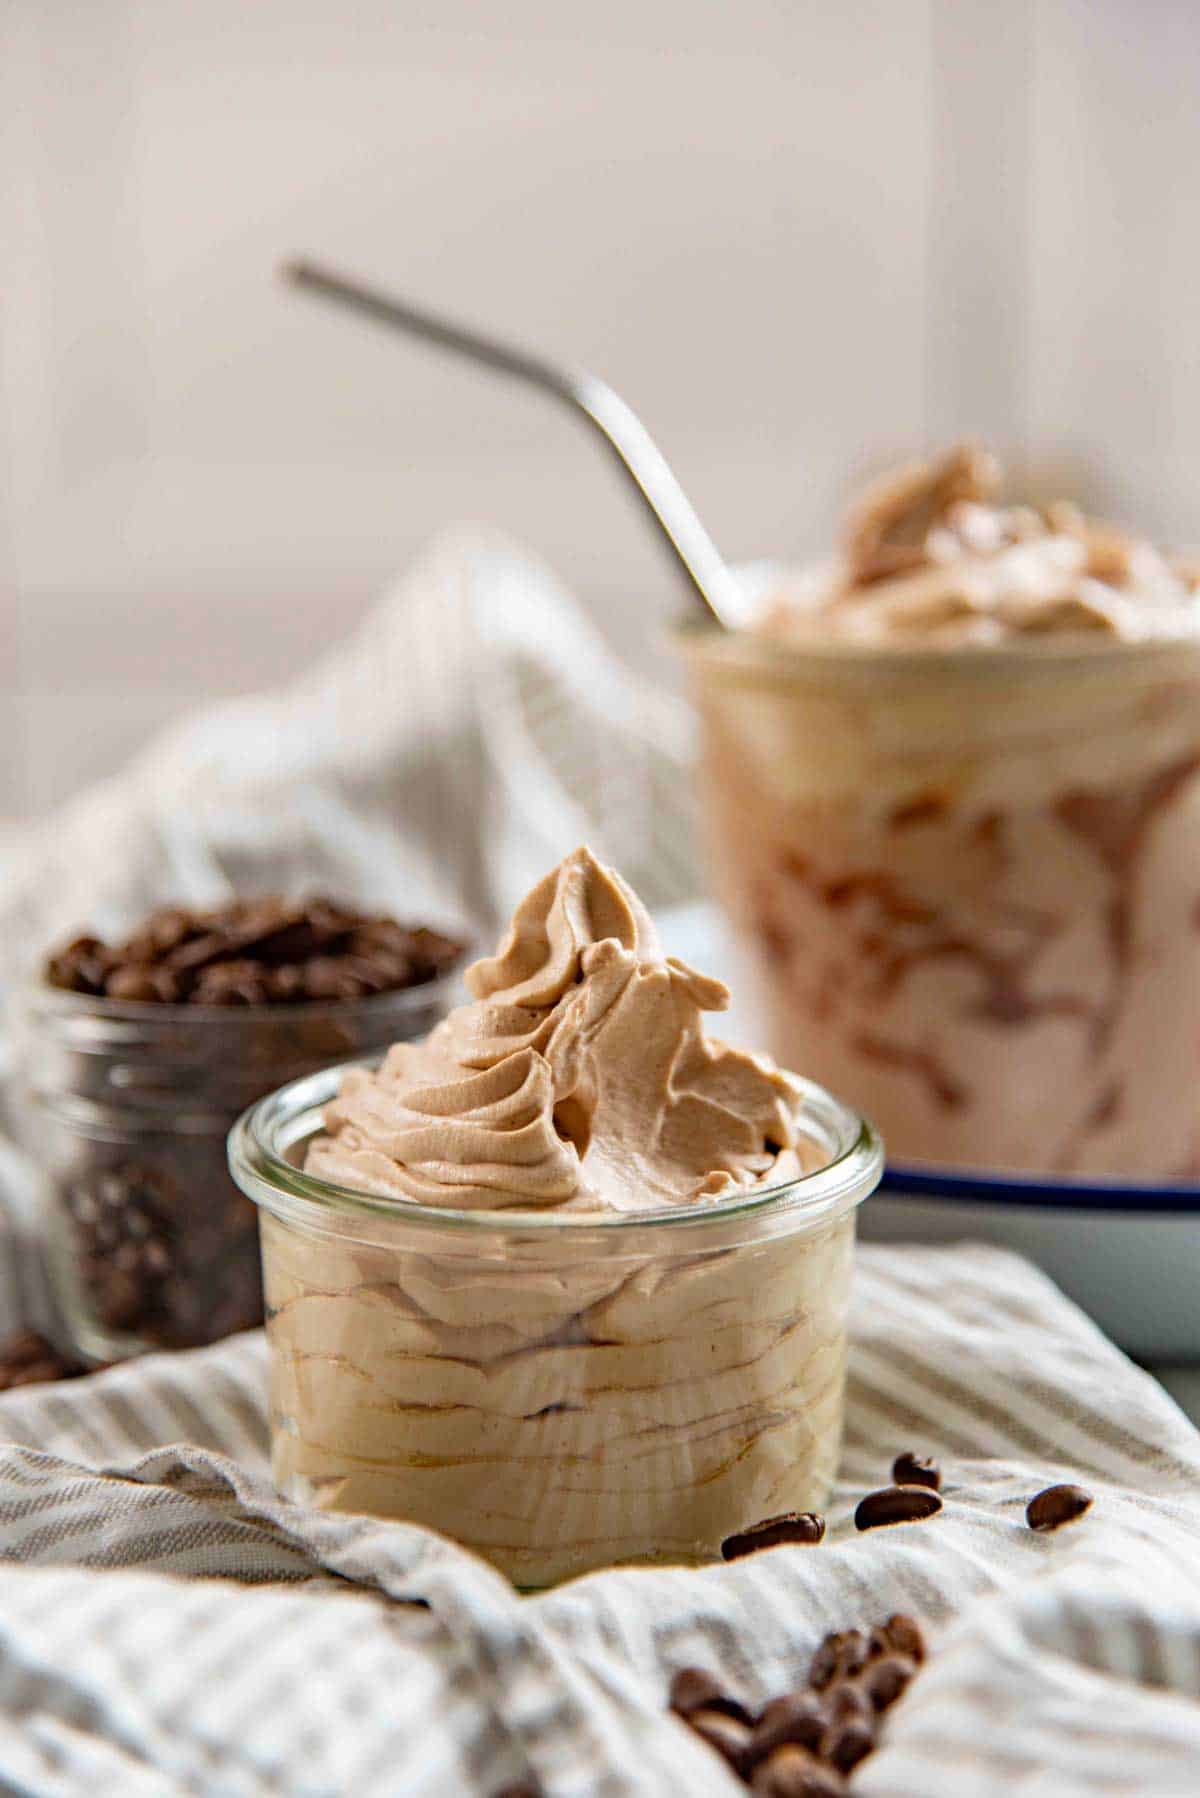
Best ways to use coffee whipped cream
- Use as a topping for homemade coffee drinks like this Nutella frappuccino or this coffee slushie, OR hot coffee drinks like a mocha.
- Dollop over desserts like this self saucing chocolate pudding, coffee panna cotta, coffee cream caramel, chocolate cake, molten chocolate lava cake, or even pound cake.
- As a filling for choux pastry and cream puffs or chocolate cream puffs (for a mocha effect!), or chocolate eclairs and especially these coffee eclairs.
- Spread or pipe as a frosting over this simple chocolate sheet cake or this coffee layer cake, or pipe on top of vanilla cupcakes or chocolate cupcakes.
Expert tips
- Use chilled heavy cream that has at least 35% fat for best results. Cream that is at room temperature will not whip properly.
- If you live in a hot climate, it would be a good idea to chill the mixing bowl as well. It’ll help to keep the heavy cream cold while whisking.
- If you use a stabilizer, then it’s possible to whip the heavy cream on a faster speed, since the risk of overwhipping is lower.
- However, if you choose not to add a stabilizer, then it’s best to whip the cream at a medium speed initially and switch to low when the consistency is almost right. This prevents the cream from overwhipping.
- For best results with a strong coffee flavor, use instant espresso powder! This used to be harder to find, but now Nescafe has an espresso powder that’s available in the coffee aisle in most North American supermarkets. You can also use instant coffee granules that come in a bottle or sachets, which are accessible in most countries.
Recipe FAQs
Why is my coffee not dissolving in the whipped cream?
Please make sure you’re using INSTANT espresso powder or INSTANT coffee granules. These will absolutely dissolve in water instantly.
However, if you’re using ground coffee or espresso coffee – these are a product of coffee beans that have been ground, and will not melt in a liquid.
The coffee that you put in your coffee maker or espresso machine to brew coffee will not work in this recipe.
Can I make coffee whipped cream with regular ground coffee?
Unfortunately, the resulting coffee whipped cream will be very weak in flavor.
You can heat regular ground coffee with the cream to make a strongly infused coffee flavored cream, and then chill the infused cream and whip it.
However, this can create a few problems.
1) The cream must be simmered to allow for maximum flavor infusion, but boiling the cream may also make the whipped cream less stable and not whip properly.
2) As more air is incorporated into the cream when whipping it, the flavor will be weaker. And it’ll be difficult to add more coffee flavor to the whipped cream.
How can I fix grainy whipped cream?
It is possible to fix grainy whipped cream to an extent.
This requires adding more heavy cream or double cream into the overwhipped whipped cream and stirring the mixture to make it smooth again.
Then using a whisk to stir the mixture so that you can gently re-incorporate air to get it to mid peaks. Otherwise, you can easily overwhip it again.
Recipe

Coffee Whipped Cream
US based cup, teaspoon, tablespoon measurements. Weight measurements are recommended for accurate results whenever available.
Common Measurement ConversionsIngredients:
- 480 mL heavy cream 2 cups (at least 35% fat)
- 50 g white sugar ¼ cup, add more if you prefer a sweeter whipped cream
- 1 tbsp instant espresso powder I use about 1 ½ tbsp (see recipe notes for substitutions)
- 2 tsp vanilla extract optional
- ⅛ tsp sea salt up to ¼ tsp sea salt
To stabilize the whipped cream
- 2 tsp gelatin powder about 6 g (see recipe notes for instant clearjel measurements)
- 2 tbsp room temperature water 30 mL
- 45 mL chilled heavy cream 3 tbsp
Instructions:
- Place the room temperature water in a microwave-safe bowl with the gelatin. Stir the gelatin so that it's fully saturated with the water.2 tbsp room temperature water, 2 tsp gelatin powder
- Set the gelatin-water mixture aside to bloom / hydrate for about 10 – 15 minutes. The gelatin is fully bloomed when the water is absorbed and the gelatin feels firm to the touch.
- Microwave the gelatin in 10 second bursts to melt it, but make sure not to let the gelatin boil!
- Remove the melted gelatin and set it aside to cool down slightly, while still remaining a liquid. ALTERNATIVELY, stream in 2 – 3 tbsp of CHILLED heavy cream into the melted gelatin while constantly stirring to temper the gelatin and cool it down faster.45 mL chilled heavy cream
- Place the chilled heavy cream, sugar, vanilla extract, salt, and instant espresso powder in a mixer bowl.480 mL heavy cream, 50 g white sugar, 1 tbsp instant espresso powder, 2 tsp vanilla extract, ⅛ tsp sea salt
- Start whisking the ingredients together, and gradually increase the speed to medium high.
- Stream in the melted and cooled gelatin mixture. Be careful and avoid pouring it onto the whisk, as the gelatin could splatter on the bowl and make the cream lumpy otherwise.
- After adding the gelatin, increase the whisking speed to high and whisk for about 1 minute to allow the gelatin to mix in really well.
- Lower the speed to medium high or medium and whisk until the cream reaches mid peaks.
- Taste the whipped cream while it’s at soft peaks or mid peaks, and add more sugar or instant espresso powder and stir it in to get the desired flavor.
- Whisk on low – medium speed or whisk by hand until the whipped cream reaches stiff-ish peaks / firm peaks (i.e. between mid and stiff peaks). At this stage, the whipped cream still looks soft and smooth, and the peak folds over just slightly at the tip.
- Because of the gelatin, the cream will start to set, so the whipped cream should be used immediately. However, you can stir the whipped cream after it "sets" to get a soft, creamy consistency again.
Recipe Notes
Using instant clear jel
For this recipe (2 cups of cream), you will need2 ½ tsp instant clearjel.
Method
- Whisk the instant clearjel with half of the sugar (about 2 tbsp). Whisk well until the clearjel is mixed through with the sugar.
- Place the sugar and instant clearjel mixture in the mixer bowl.
- Add about ½ – ¾ cup of the heavy cream and whisk vigorously with a hand-held whisk.
- The instant clearjel should disperse evenly throughout the cream. There should be no large lumps, but it might look slightly grainy (not split, but look like there’s undissolved sugar).
- Allow the mixture to sit for about 5 minutes in the fridge.
- Then add in the remaining sugar and heavy cream and other ingredients and whisk, following the recipe.
- Skip the step of adding the gelatin.
Instant espresso powder substitutes
For 1 tbsp of instant espresso powder, substitute with1 tbsp coffee extract (1:1 substitute) OR
1 ½ – 2 tbsp of instant coffee granules. For best results, taste the whipped cream and add more if you like. Do NOT use regular ground coffee, as this will not dissolve in the cream.
Nutrition Information:
“This website provides approximate nutrition information for convenience and as a courtesy only. Nutrition data is gathered primarily from the USDA Food Composition Database, whenever available, or otherwise other online calculators.”


Leave a Reply