


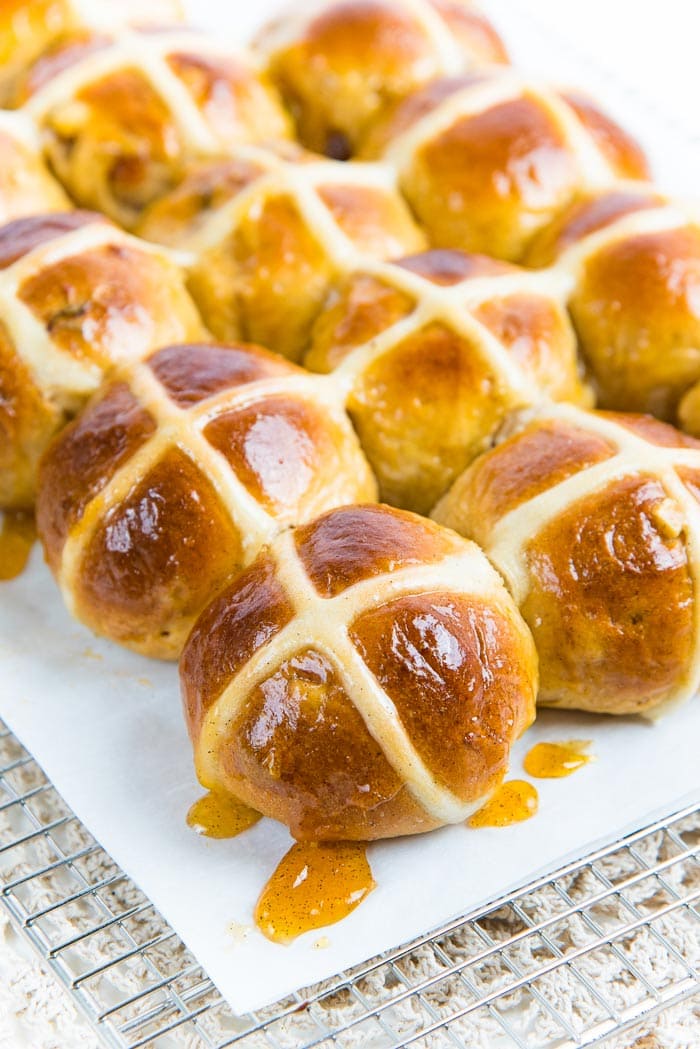
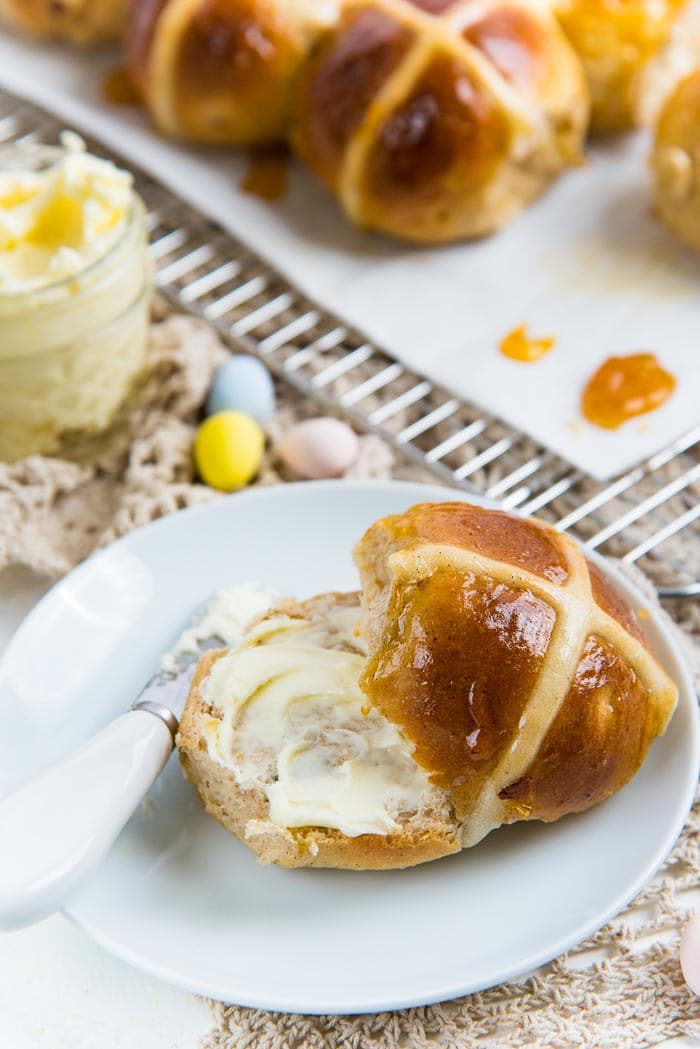
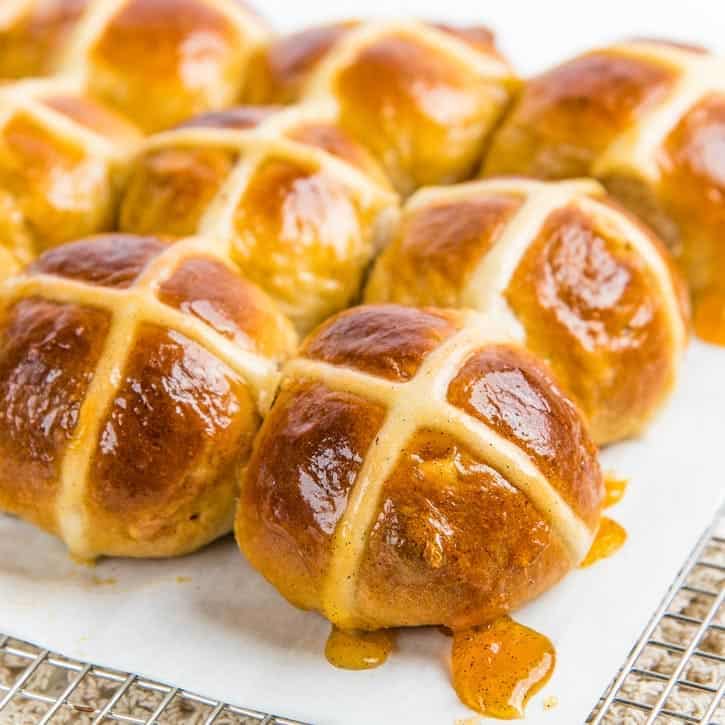
The most amazing spiced hot cross buns with a sweet, fruity apricot honey glaze! These are also the softest and fluffiest hot cross buns you could ever make because of the simple Tangzhong method used to make the dough (à la Japanese milk bread).
For more delicious variations, check out these chocolate chip hot cross buns and bunny buns (Easter bread rolls). And make hot cross bun bread and butter pudding with stale, leftover buns!
Back when I used to live in Australia and New Zealand, we’d get hot cross buns of all kinds of flavor popping up in bakeries everywhere, for months leading up to Easter.
There used be a bakery below my clinic in Lismore, Australia, and they made some of the softest and incredibly delicious hot cross buns, and it made our whole building smell like sugar, spice, and bread for days! Even better, they knew us, and would dole out free buns every now and then. They might as well have included that in the benefits package of my job.
So, growing up in that part of the world, soft, fluffy, tasty hot cross buns were a staple around Easter, and I never had a reason to make my own. But that supply ran out when I moved to the US. It’s a good thing that I know how to make bread, and created my own super soft and fluffy hot cross buns recipe!
Why these are the softest hot cross buns ever (recipe highlights)
- The high hydration level of this dough combined with the tangzhong make these hot cross buns super soft!
- I share step by step instructions on how to make traditional style hot cross buns with a flour paste cross, PLUS how to make frosting crosses on the buns as well.
- Homemade hot cross buns often tend to be a little crumbly and dry because the gluten isn’t properly developed. With my technique, you can focus on getting the right dough consistency!
- I share an easy, classic bread making technique on how to add the dried fruits and other mix-ins, so that they are evenly distributed throughout the dough, without having to knead it all in.
- I provide many add-in options that you can choose from and how to prep them to make them taste even better in the buns!
What are hot cross buns?
Hot cross buns have a super interesting history, which you can read about in this article. The cross on hot cross buns eventually became a symbol of the crucifix, as they were made on Good Friday (or the day of the cross).
But the crosses started as a pagan symbol to celebrate Eostre, during the Spring Equinox. The dried fruits included in the bread were a symbol of prosperity.
It was believed that breads baked during Good Friday would never go moldy, and could be used to ward off evil spirits and also be used to heal the sick.
Hot cross buns are still a Good Friday and Easter tradition, and besides the popular nursery rhyme, they are also known to be sweet, soft, sticky, spiced buns that are filled with raisins and / or mixed peel, and are absolutely delicious to eat!
Tangzhong method of bread baking
My homemade hot cross buns recipe includes a little twist to make them even softer and fluffier than traditional recipes. And that little secret is tangzhong.
Tangzhong is a Japanese cooking technique used in making milk bread. I use tangzhong to make my classic Japanese milk bread (Hokkaido milk bread) and this scallion and sesame milk bread variation. I also use it to make these classic Sri Lankan tea buns that are a tea time tradition in Sri Lanka.
Tangzhong is a slurry of cooked water (or milk) with flour. A small amount of flour and liquid is cooked on a stove to make a runny paste. It doesn’t take more than 5 minutes.
As the liquid heats up, the flour absorbs the hot liquid, creating expanded starch molecules and gluten structures. This is then mixed with the rest of the ingredients.
This flour paste makes the dough softer by adding extra water that’s directly absorbed by a small amount of flour. It acts like a spongy matrix by creating a stable network in the bread, IN ADDITION to gluten. It also introduces moisture to the bread without drying out the flour.
It’s a really simple technique to elevate the flavor and texture of bread with delightfully soft, fluffy results.
Ingredients you’ll need

Bread dough
- Flour – I use all purpose flour here.
- Milk – Adds flavor and softens the dough as well. Milk is needed to add hydration to the dough and to make the tangzhong.
- Sugar – To add sweetness.
- Yeast – You can use active dry yeast or instant yeast for this recipe.
- Butter – Butter adds flavor and also enriches the dough for a softer dough.
- 2 eggs – Adds flavor and richness.
- Spices – I use a mix of cinnamon, allspice, nutmeg or cloves.
- Orange zest and vanilla – Adds flavor.
While I use a mixture of all these ingredients, you can just choose only one, or multiple ingredients.
- Mixed peel
- Raisins / sultana
- Currants (dried currants – not fresh currants)
- Orange juice to hydrate the raisins

Topping
- Confectioner’s sugar – To create the flour paste for the cross.
- Flour – To create the flour paste for the cross.
- Water – To create the flour paste for the cross.
- Apricot jam – For the glaze.
- Honey – For the glaze.
- Vanilla (optional) – For the glaze.
Other options to create the cross on top of the buns
A feature of classic hot cross buns is the crosses on top. Without that, they are simply spiced bread buns / rolls.
There are different ways to create this cross on the buns.
- Flour paste – Traditional method, and piped BEFORE baking the bread. Adding a little sugar to the flour adds some sweetness to it, so that it doesn’t make the hot cross buns bland. Once baked, they become crispy and add a lovely crunch as well. This is my preference.
- Icing / frosting – This adds more sweetness to the bread. A powdered sugar frosting is piped on top to create the cross AFTER baking the buns. You can add different colors to the frosting to make it look colorful, and might be more appealing to kids as well.
- Pastry cream – Another option to pipe the cross on top. Thick pastry cream is needed so that it won’t spread. You can add it before or after baking, but the pastry cream will melt and spread during baking. It is a less sweet version of frosting, and sweeter than flour paste. You could try vanilla pastry cream, chocolate pastry cream, or even white chocolate pastry cream.
Glazing options
While I am using an apricot honey glaze here, which makes the hot cross buns hella sticky, this is an optional step. If you don’t like the stickiness, you can simply brush the dough with an egg wash before baking as well.
The egg wash glaze simply adds a sheen, and no flavor. The apricot honey glaze on the other hand adds a sweet, fruity flavor.
How to make hot cross buns
The base for these classic hot cross buns is my homemade hot dog buns recipe, another really popular recipe on the blog.
Step 1 – Make the tangzhong

The tangzhong paste is easy to make and comes together quickly. Whisk cold milk and flour together until you have a smooth mix with no lumps. Then heat the milk while constantly whisking. As the mixture starts to heat up, it’ll start to thicken. When the flour and milk mixture is thick enough to form a loose paste, it’s done. The milk also usually starts to boil.
Let the tangzhong paste cool down before using. The tangzhong paste should be at room temperature OR slightly warm when you add it to the dough.
Step 2 – Activate the yeast
Active dry yeast MUST be activated before adding it to the dough. Instant yeast usually doesn’t require activation, but I like to activate the yeast regardless of which type I’m using. Especially if the yeast is older than a month. This ensures the yeast will properly proof the bread (image 1).

Step 3 – Add all the ingredients to make the dough
Add all the wet ingredients to make the dough, including the tangzhong (image 2). Then add the dry ingredients (image 3) and mix until it comes together. Then knead the dough for about 10 – 20 minutes (image 4), until the dough becomes shiny and smooth. Make sure to stop and scrape down the bowl from time to time so that the dough mixes evenly.
PLEASE NOTE that this is a sticky dough! When the dough is being kneaded, it will stick to the bottom of the bowl. Please do not add more flour! While the extra flour will help bring the dough together, it will also make the bread very dry once it bakes.
If you continue to knead the dough, the gluten will develop and make the dough more cohesive.
The dough will start off looking really sticky (image 4), and lumpy, and then transform into a smooth shiny ball of dough (images 5 – 6). Once the dough is kneaded with enough gluten in the dough, it’s ready for its first proof.

How to know if the dough is properly kneaded – The dough will still be very soft, but less sticky on the surface (only tacky to the touch). The dough surface will also be smooth. If you try to lift the dough out of the bowl using the dough hook, the entire dough ball should come out cleanly (without the dough hook tearing through the dough).
Step 4 – Initial proof
Shape the dough into a tight dough ball and place it back in the mixer bowl (image 7). Then cover the bowl and let it proof in a warm place until it’s about 1.5 – 2 times its original size. This should take about 40 – 60 minutes, depending on the temperature of the kitchen, so keep an eye on the dough (image 8).
Why I don’t add fruits to the dough while kneading
You may notice that I haven’t added any fruits to the dough yet. While some recipes add the fruits when kneading the dough, I prefer to add the fruits AFTER the dough has had a chance to develop structure and gluten.
Hot cross buns have a better, softer structure when the dough has been kneaded properly to form a smooth and supple dough. By adding raisins and other additions at the beginning, it can interfere with gluten formation during the kneading process. This means that the dough must be kneaded for even longer to get the right consistency.
This isn’t too much of a problem if you have a heavy duty mixer, but most household mixers may not be able to handle this as efficiently.
You can add the raisins AFTER gluten has formed, but the mix-ins may not distribute through the dough evenly either. I have done this in the past, and the results are OK. But I do find pockets of dough with no raisins / mixed peel when I do this.
My method of “laminating” the fruits with the dough is an extra step, BUT it’s easier and saves the mixer from running longer ,AND evenly distributes the fruits throughout the dough!
Step 5 – Prepare the fruits and mixed peel
There are different add-ins you can add to traditional hot cross buns.
- Currants, sultanas, or raisins
- Fresh fruits like chopped apple, pears, orange, tangerines, or mandarins
- Nuts like almonds, walnuts, pecans
- Mixed peel (or just orange peel)
You can use a combination of these OR just one! Here I use a combination of raisins / currants and mixed peel.
When I’m using dried fruits like raisins, currants, or sultanas, I like to rehydrate them to soften them slightly. This helps the texture of the hot cross buns by,
- Preventing the dried fruits from drawing moisture from the bread as it bakes, and keeping the bread from being too dry or tough after baking.
- Adds more flavor to the fruits, and in turn the final hot cross buns.
The dried fruits are soaked in warm orange juice (add a little alcohol if you like!), and then the excess juice is strained out once the fruits have plumped up. Mix the dried fruits with the mixed peel (or any other add-ins), you’ll be using (as seen on image 9).

Step 6 – Adding the fruits to the dough / lamination
Since making these hot cross buns hundreds of times over the years, I have found that the EASIEST way to add the fruits to the dough with even distribution is with a technique called “lamination”.
What is lamination?
As you may know, lamination is a term most commonly used when making things like croissants, chocolate croissants, or puff pastry. This is because butter is laminated with dough to create the layers. But lamination is actually a much broader term in bread baking.
Bread dough can also be laminated with other types of fillings as well, and we see this in sourdough bread baking. The dough is stretched and filling is added. Then the dough is folded over to “laminate” the filling in the dough. We’re using that same technique here!
Turn the proofed dough out onto a lightly floured surface and gently stretch out the dough on your work surface (images 9 – 10). The dough doesn’t have to be precisely and evenly thick, but having it fairly even will be a good idea. Usually the edges might be thinner than the center, and that’s OK.

Once the dough is stretched out (image 11), sprinkle about 2/3 of the filling over the dough (image 12). Fold over roughly 1/3 of the dough towards the center (image 13), and repeat with the opposite 1/3 of the dough (image 14). Sprinkle the remaining add-ins on top (image 15).
Start folding / rolling up the dough to encase the add-ins (image 16). Fold the dough to form a ball shape (image 17).

Step 7 – Cold proof the dough
Place the dough back in the bowl (image 18), cover it with plastic wrap and transfer it to the fridge. This is an overnight cold proof.
While this step can be “optional”, chilling the dough will make it much easier to handle and shape later (image 19). The overnight proof will also help the dough develop flavor, and for the flavors of the add-ins to infuse into the dough as well.
Step 8 – Shape the dough
This is when we’ll be portioning and shaping the dough. So what is the best way to portion out the dough?
Deflate the dough and then weigh it (image 20).

You can weigh the dough and then divide it by the number of portions you need (image 21). Then you’ll know how big each portion needs to be.
Divide into 15 portions for medium-sized hot cross buns, or into 20 – 24 portions for smaller hot cross buns. For this spiced hot cross bun recipe, the weight will vary depending on the add-ins that you use. But for me, each portion is about 73 – 75 g for 15 portions, or about 45 – 50 g for 20 – 24 portions.

It’s important to shape the buns well, so that they keep their shape as they are rising. I like to lightly work the dough first by folding in the edges of the dough towards the middle until the dough portions feels tight (images 22 – 23).
Then form it into a ball by pinching it at the bottom to seal the seams (image 24), which will create a smooth surface on top. Then I roll this dough ball on a surface with a cupped palm to shape it (image 25). Repeat with all the portions of dough.
Step 9 – Proof the hot cross buns
Place the buns on a parchment paper-lined baking tray. I use a half sheet baking tray, as it will be large enough to keep 15 portions or 20 – 22 portions. Place the buns about 1/2 inch apart from each other (image 29).
- For 15 buns – place them in a 3 x 5 configuration
- For 20 – 24 buns – place them in a 4 x 5 configuration or 4 x 6 configuration.

Cover the tray loosely with plastic wrap and let it proof one last time until doubled in size, before baking. The proofing time will vary depending on the ambient temperature.
In winter, I prefer to proof the bread in my oven with the oven light on. The proofing setting in my oven is a little too warm for proper proofing.

Step 10 – Preparing the flour paste cross
You can choose to have a flour paste cross on the buns for a more traditional look, or skip this if you prefer to have a frosting cross on top instead.

Mix the flour and confectioner’s sugar together in a bowl (image 26). Add just enough water to make into a pipeable paste (image 27). The paste should be easily pipeable, but hold its shape without running or spreading. Place the paste in a piping bag or ziploc bag (image 28).
Once the buns are proofed, remove the plastic wrap (image 30). Snip the corner of the piping bag or ziploc bag and pipe a flour paste cross on top of all the buns (image 31).
Step 11 – Bake the buns
When the buns are almost proofed, preheat the oven. When the buns are ready to be baked, pipe the flour paste on top and bake them in a preheated oven. Also get the glaze for the buns ready as well.
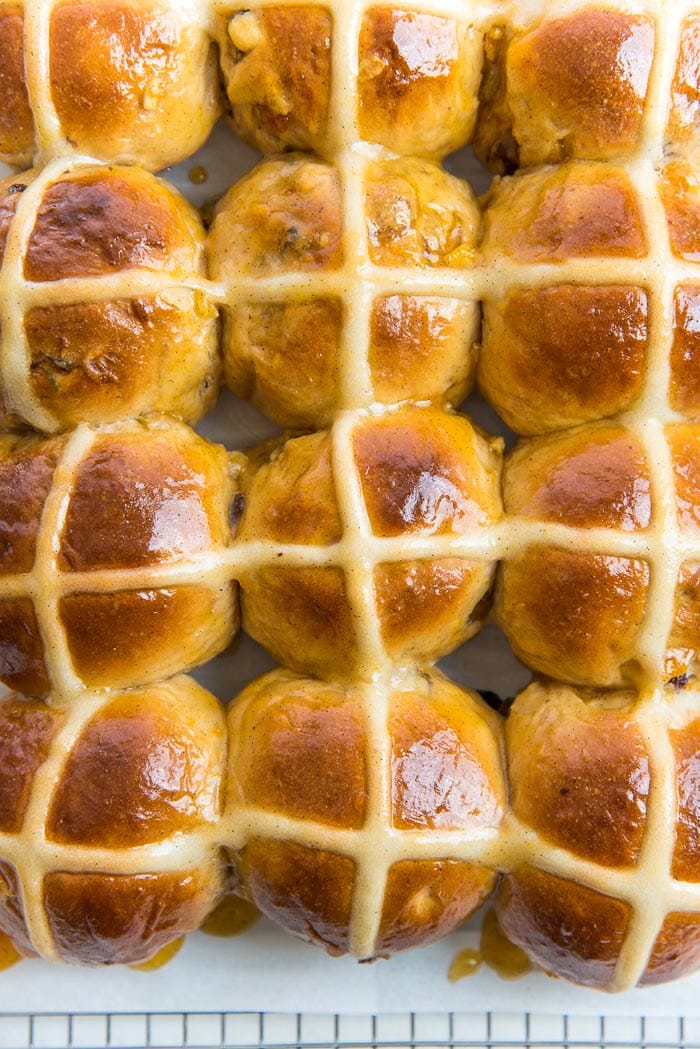
The buns will take about 20 – 30 minutes to bake, depending on their size. The internal temperature of the buns (in the middle) should reach about 190 – 200 F, and the buns should look golden brown (image 32).
Step 12 – Glaze / frost the buns
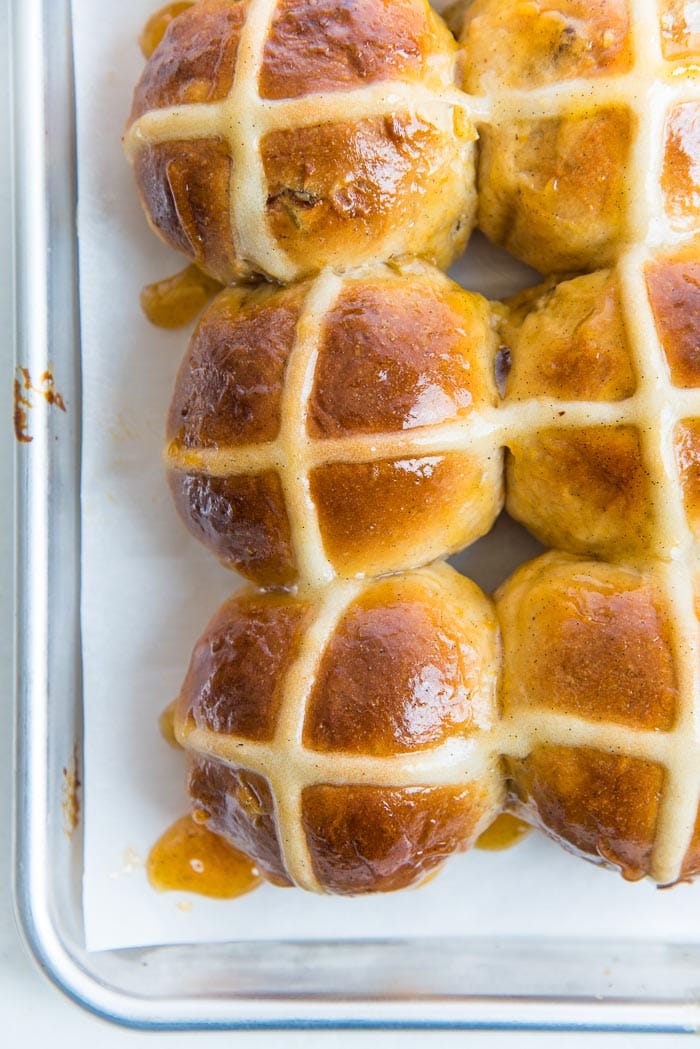
Once the buns are baked, remove them from the oven and brush the top of each bun with the warm glaze (image 33). Allow the buns to cool down on a wire rack (image 35). You also have the option of piping the tops of the cooled down buns with frosting (image 34).

Tips for the best hot cross buns
- Measure all the ingredients by weight – It’s no secret that I prefer to weigh dry ingredients (and sometimes wet ingredients) with a kitchen scale, rather than relying on measuring cups. A basic, inexpensive kitchen scale guarantees consistent, accurate results. If you don’t have a kitchen scale at hand, you can use cup measurements, but make sure to use the spoon and level method to measure the dry ingredients.
- Activate the yeast – While instant yeast does not need to be activated traditionally, I still like to activate my dry yeast before using it, especially if the yeast is more than a month old.
- Do not add more flour – Yes, this dough is sticky. Yes, you do have to knead the dough on medium speed to ensure good gluten development. Just trust the process! If you add more flour to the dough to help “form the dough”, you’re reducing the hydration content in the dough. This will make for drier or crumblier hot cross buns.
- Increase hydration levels IF needed – If you used cup measurements, or used bread flour, you may need to add more water. Ensure that the dough is sticky, and is sticking to the bottom of the bowl as you knead it. If it isn’t sticking to the bowl, then the dough might be too dry.
- Use my lamination technique to distribute and layer the add-ins evenly throughout the dough. This method reduces gluten disruption, reduces stand-mixer fatigue, and ensures even distribution of your mix-ins.
- Proof the dough properly before baking! Underproofed dough will be dense. Overproofed dough will have little shape, and could even collapse during baking, and become dense. Properly proofed dough will create light and fluffy hot cross buns.
Storage tips
- Place the baked and cooled buns in an airtight container. They can stay at room temperature for up to 2 – 3 days, but the bread can become stale with time, especially if it’s winter and it’s cold and dry in the kitchen. Warming them up in the oven or microwave will help.
- You can also store the buns in an airtight container in the fridge as well. It will last longer in the fridge, for about 7 days. But bread can also become stale in the fridge. Just warm it up for a few seconds in the microwave before eating.
- If I know that I need to keep leftover hot cross buns fresh for longer, then I store them in the freezer for up to 1 month. Just let them thaw out at room temperature OR reheat them in the oven before eating.
- If you do end up with stale, leftover buns, you can make hot cross bun bread pudding to transform the leftovers into an even more rich and custardy dessert!
Frequently asked questions
Can you make these ahead of time?
You could, but they do become stale fairly quickly because we’re not adding any preservatives or dough conditioners, unlike in bakeries.
So if you make these ahead of time, the best way to store them is in the freezer. While hot cross buns with flour paste crosses can be frozen, frosting or pastry cream piped hot cross buns cannot be frozen, as the frosting can become runny when thawed.
Can you freeze hot cross buns?
Yes, you can! But make sure the hot cross buns don’t have any frosting on top. The frosting can become runny as it thaws out.
Why are my hot cross buns dense (and not as fluffy)?
The buns can be dense for a number of different reasons.
1 – Adding too much flour or inaccurately measuring the flour. Results in a drier dough that is heavier.
2 – Underproofed buns before baking, or dead yeast that wasn’t proofing the dough. Results in a dense crumb and buns that do not rise properly during proofing and baking.
3 – Overproofed buns that expanded and collapsed during baking. Results in a dense crumb because the dough collapsed.
Can you make these egg-free or vegan?
You can, but the dough will be a little stickier than the non-vegan version. Substitute each egg with 1/4 cup (or more accurately 50 – 55 g) of extra plant-based milk.
Since milk contains more water than eggs, the dough will be stickier. Substitute the butter with vegan butter, and substitute the milk with plant-based milk.
How do you serve / eat hot cross buns?
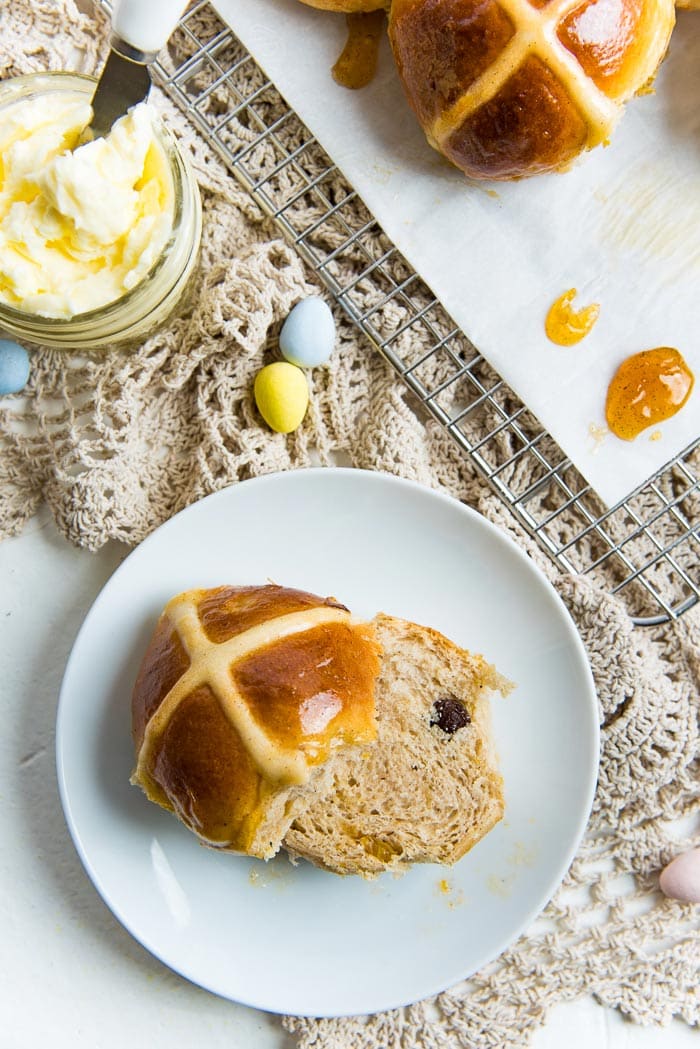
My favorite way to eat them is while they’re a little warm, with a little salted butter. But they taste even better when they are toasted and served with butter and maybe a little jam or clotted cream!
Other recipes you may like
Equipment I use for this recipe
- Pastry brushes – To brush the hot cross buns with glaze.
- Silicone Spatulas – I love this set, and I have it in two sizes. They are perfect for different baking/cooking needs.
- Stand mixer – I love my KitchenAid mixer
- Measuring cups – I use cups to measure liquid ingredients. I absolutely LOVE my colorful cup measuring set, and I also love my pyrex measuring jugs too.
- Sheet pan – You can use your sheet pan to keep the shaped hot cross buns, so that they will be ready for baking.
- Kitchen scale – Makes the process of weighing these ingredients much easier.
Recipe
Soft, Fluffy Hot Cross Buns
US based cup, teaspoon, tablespoon measurements. Weight measurements are recommended for accurate results whenever available.
Common Measurement ConversionsEquipment:
- Stand mixer
- Silicone spatulas
- Measuring spoons and cups
- Weighing scale
- Piping bag or ziploc bag (to pipe flour crosses)
- Pastry brush
Ingredients:
For the bread and tangzhong
- 240 mL warm milk divided in half – 120 mL each (1 cup, divided into ½ cup portions)
- 450 g AP flour 4 cups, measured by spoon and level method (set aside 2 ½ tbsp / 25 g of the flour)
- 7 g active dry yeast 2 ¼ tsp. (you can also use instant yeast)
- 100 g granulated white sugar ½ cup
- 56 g unsalted butter ¼ cup (melted)
- 2 large eggs
- 1 ½ tsp ground cinnamon
- ½ tsp allspice
- ½ tsp ground cloves
- ¼ tsp grated nutmeg
- 1 tsp salt
- 2 tsp grated orange rind from 1 large orange
- 1 tbsp vanilla extract
Additions for the bread (see recipe notes below)
- 100 g raisins / currants
- 60 g mixed peel
- ¼ cup warm orange juice
Flour paste for the cross
- 20 g confectioner’s sugar 2 tbsp
- 62 g AP flour ½ cup, measured by spoon and level method
- 4 – 5 tbsp water 60 – 75 mL
For the glaze
- ¼ cup apricot jam
- 1 tbsp honey
- 2 tsp vanilla extract optional
Frosting for the cross (optional – instead of flour paste)
- 226 g confectioner's sugar 2 cups, measured spoon and level method
- 60 mL milk you may not need all of it
Instructions:
- Measure out all the ingredients for the dough. Separate the milk into two portions. Place 120 mL / ½ cup of milk in a small saucepan.240 mL warm milk
- Warm up the other ½ cup until just lukewarm and place it in the mixer bowl.240 mL warm milk
Making tangzhong
- Take 2 ½ tbsp (about 25 g) of the measured AP flour and whisk it into the milk in the saucepan. Make sure the flour-milk mix is completely smooth, with no lumps.450 g AP flour
- Heat the flour-milk mix over medium heat, while constantly whisking. In a few minutes, the flour-milk mix will start to thicken. Keep heating while whisking, until you have a runny paste. Remove from the heat. The tangzhong paste is now ready. (It should weigh about 130 to 140 g – about ½ cup.)
- Cover the tangzhong with plastic wrap, making sure the plastic wrap is touching the surface of the paste. Let it cool down to room temperature before using.
Add-ins and mix-ins (prepare these while the dough is proofing for the first time)
- Warm up the orange juice slightly in a pan or in the microwave. Add the dried fruits to the warm orange juice and let it sit for at least 30 minutes (this is to soften the raisins and for them to absorb orange flavor).100 g raisins / currants, ¼ cup warm orange juice
- Strain the mixture through a strainer to remove the excess orange juice. Let them sit there to let the excess orange juice drain out. The raisins should be plump and soft, but not soggy.
- OPTIONAL – If you'd like to, you can add some liquor to the orange juice to add more flavor. Such as whiskey, brandy, or rum.
- Mix the softened dried fruits with the mixed peels and set aside.60 g mixed peel
Flour paste for the crosses (prepare this while hot cross buns are proofing for the final time)
- Place the flour and confectioner’s sugar in a bowl and whisk together.62 g AP flour, 20 g confectioner’s sugar
- Add water, 1 tbsp at a time, until you have a smooth paste that is loose enough to pipe easily, but thick enough that it will not run off the sides of the buns either. (For me, this is about 4 tbsp and a bit of water).4 – 5 tbsp water
- Place the flour paste in a small piping bag or a ziploc bag, and set aside.
For the sweet glaze (make this when the hot cross buns are almost done baking)
- Place the jam, honey, and vanilla in a saucepan. Heat over low heat until the mixture is runny and liquid. To make the glaze even smoother, pass the jam mix through a fine sieve to remove any bigger chunks.¼ cup apricot jam, 1 tbsp honey, 2 tsp vanilla extract
- Return the glaze to the saucepan and keep it warm until the hot cross buns are ready.
- See recipe notes for egg wash instructions.
Making the frosting for the crosses (optional – instead of flour paste or in addition to it)
- Make this after the hot cross buns have been baked and have cooled down. It will be easier to make this with a hand mixer, or a sturdy metal whisk, as the frosting needs to be thick.
- Place the confectioner's sugar in a large bowl. Make sure there are no lumps. Add milk, just a little bit at a time (1 tbsp at a time, and then 1 tsp at a time when the the consistency is almost right), and whisk it really well to form a thick paste. The frosting only needs just a little bit of liquid to form a smooth, thick paste.226 g confectioner's sugar, 60 mL milk
- If you accidentally add too much liquid, you can add more confectioner's sugar to thicken it to the right consistency. The frosting will need to be whisked well to be smooth, while maintaining the thick consistency. Place the frosting in a piping bag. Snip the end of the bag to pipe the frosting when needed.
Making the dough
Activating yeast
- Dissolve about ½ tbsp of the sugar in the warm milk in your mixer bowl. Sprinkle the yeast over the milk and gently stir. Let the yeast activate for about 10 – 15 minutes until it looks frothy and foamy.240 mL warm milk, 7 g active dry yeast, 100 g granulated white sugar
Hot cross bun dough
- In to the mixing bowl with the activated yeast – add the rest of the sugar, eggs, melted butter, tangzhong, zest, and vanilla. Add the remaining flour, spices, and finally the salt.450 g AP flour, 100 g granulated white sugar, 56 g unsalted butter, 2 large eggs, 1 ½ tsp ground cinnamon, ½ tsp allspice, ½ tsp ground cloves, ¼ tsp grated nutmeg, 1 tsp salt, 2 tsp grated orange rind, 1 tbsp vanilla extract
- Mix all the ingredients together to form a scraggly dough.
- With the kneading hook attached to the stand mixer – knead the dough until you have a smooth dough (about 2 – 3 minutes). Check the consistency of the dough. It should be soft and sticky. When kneading the dough at mid speed, the dough should still stick to the bottom, but not to the sides of the bowl. If needed, add more milk to the dough to get it to the right consistency as described.
- Knead the dough for a further 10 – 15 minutes, alternating between low speed (2 – 3) and medium speed (5 -6). The higher speed is needed to help form the gluten. Make sure to scrape the bottom of the bowl once or twice during this time to ensure the dough is kneading evenly.
- The dough is done kneading when the sides of the bowl are clean of the dough when kneading on medium speed, and the dough looks shiny and smooth. When you lift up the dough from the bowl using the kneading hook, it should cleanly come out in one piece, without leaving any dough behind. Alternatively, the dough should be close to passing the window pane test.
- Take out the kneaded dough and shape it into a ball. Place this ball of dough back in the bowl and cover with plastic wrap. Proof the dough in a warm place until it is about 1.5 – 2 times the size.
Laminating the dough with mix-ins
- Take the proofed dough out of the bowl and onto a lightly floured work surface. Use lightly floured hands to evenly stretch out the dough on the work surface. It's OK if there is some tearing, but the dough should stretch out really well if the dough was properly kneaded before.
- The dough should be stretched out to a rough shape of 2 x 1.5 ft, and fairly evenly thinly. It doesn't have to be exact and the edges will be thinner than the middle.
- Take the raisin and mixed peel mixture and sprinkle about ⅔ of the mixture over the surface evenly. Fold roughly ⅓ of the dough over the middle, and the remaining ⅓ of the dough over the center as well. See pictures in the post for reference.
- Sprinkle the remaining ⅓ of raisins and mixed peel mixture on top of the folded dough. Fold or roll up the dough to enclose the filling in the dough. Fold the dough to form a ball shape.
- Place the fruit filled dough ball in the mixer bowl. Cover and let the dough proof in the fridge overnight (see recipe notes below).
Portioning and shaping the buns
- Line a half sheet baking pan with parchment paper.
- When the dough has proofed overnight, remove the dough and place it on a work surface. Gently press on the dough to remove excess air.
- Weigh the dough and then divide it into equal portions to form hot cross buns. Portion 15 equal portions to make medium-sized hot cross buns similar to storebought ones. OR between 20 – 24 portions to make smaller buns.
- Take each dough portion and fold over the edges towards the middle to form a tighter dough. Then pinch these edges at the bottom to seal. Place the dough ball with the seam side down on your work surface. Gently roll the ball of dough with a cupped palm to shape the dough ball. Make sure the work surface doesn't have much flour to allow the dough to tighten into a smooth ball.
- Repeat this process with all the dough portions.
- Place each bun on the prepared baking pan, with about ½ inch of space between each. Arrange them in a 3 x 5 configuration for 15 buns. OR 4 x 5 configuration for 20 buns. OR 4 x 6 configuration for 24 buns.
- Cover the hot cross buns with plastic wrap and let them proof for the final time. On a cold day, this takes me about 90 minutes, and on a hot day, about 45 minutes. You can also let them proof in the oven, with the oven light on. But remember to take them out when you're preheating the oven!
- Finger indentation test – The way I test for proofing is by gently pressing my fingertip into a couple of the buns. If the indentation springs back up completely, then it’s not ready. If the indentation springs back half way, leaving a shallower indentation, then they are sufficiently proofed and are ready to be baked.
Baking the hot cross buns
- While the dough is proofing, prepare the flour paste for the crosses, and preheat the oven to 350°F / 180°C.
- If you're using the flour paste, this must be piped on before baking the buns. You can skip this if you want to pipe frosting instead for the crosses.
- Snip off the tip of the piping bag for the flour paste (make sure the opening is smaller than the desired thickness of the lines you want to pipe). Pipe the flour paste on the proofed buns as desired for the crosses.
- Place the buns in the preheated oven and bake for 25 – 30 minutes. Rotate the tray if needed, half way through baking.
- While baking, prepare the sticky glaze, and keep it warm.
- As soon as the buns are done baking (an instant read thermometer will register at 190 – 200°F when they are done baking), remove the baking tray from the oven.
- Brush the warm apricot glaze over the freshly baked buns, and then let them cool completely.
- When the hot cross buns have cooled down, or slightly warm, they can be served. But you can pipe the frosting on top before serving as well (after the buns have cooled down).
- These are best eaten warm or lightly toasted with a little butter. Enjoy!
Recipe Notes
Storage instructions
Keep the buns in an airtight container at room temperature for up to 2 – 3 days. If you want to keep it for longer, place them in the freezer for up to 1 month.Egg wash option
Before piping flour crosses on the buns, glaze the buns with an egg wash. Then pipe the crosses on the hot cross buns, and bake according to the recipe. You will NOT need the apricot glaze if you use egg wash (but note that the egg wash will not add a sweet, fruity flavor like the honey apricot glaze).Egg wash recipe
1 egg yolk + 2 tbsp cream, mixed together.Vegan options
- Use almond milk or soy milk instead of regular milk for the recipe.
- Instead of 2 eggs, use 100 g of plant-based milk. Or you can also use 50 g milk and 60 g apple sauce.
- Use vegan butter in place of regular butter.
Note about the add-ins
You can use a combination or just 1 of the options I’ve provided. You can also add other add-ins. To keep the recipe consistent, I recommend that you do not exceed a total 160 g of add-ins in this recipe.Note about the overnight cold proof
You can skip this step if you like. But the dough will be very soft and fairly sticky when forming into buns. Avoid using too much flour, as this will dry out the hot cross buns. The overnight proof will chill the dough, making it easier to manage. It will also help to develop the flavor of the dough further!Recipe update – March 2025
After making hot cross buns for years, I have now switched to adding the fruits to the dough after the first proof. I do this using a technique called “lamination”. This means that the dough will have better gluten development without having to add the fruits to the mixer. This way, your stand mixer won’t need to work too hard to knead the dough to the right consistency either. And it’s much easier this way to ensure the fillings are evenly spread throughout the dough.Nutrition Information:
“This website provides approximate nutrition information for convenience and as a courtesy only. Nutrition data is gathered primarily from the USDA Food Composition Database, whenever available, or otherwise other online calculators.”


Leave a Reply